Well if you ever wondered how to make this very slicked hairstyle here's a tutorial from Love Aesthetics. The blogger, Ivania Caprio, has that unusuall style that shines on her personality. That's why I love her blog, it's so beautiful, and represents the minimalicstic lifestyle. And so is this hairstyle. I only saw it on runways last year (but they're coming back this year too! Only in sleak ponytails, buns and more...). Learn how to make it:
24 Eylül 2012 Pazartesi
Slicked Back Hair
16 Eylül 2012 Pazar
Beachy Waves, Kristen Stewart Way
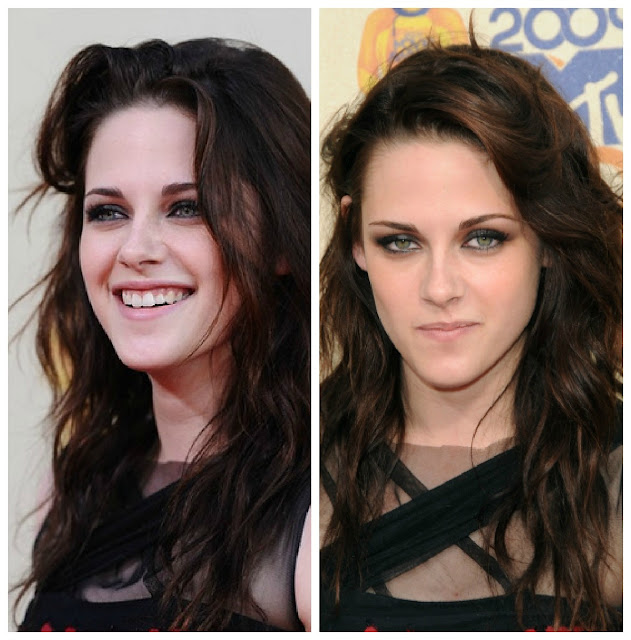
Hey everyone, sorry for not posting anything for these few days. I guess I'm feeling a little uninspired.... but I think I'm getting back my inspiration with the amazing beachy waves that are Kristen Stewart's signature look. They look so youthful, fun and intentionally made to look "undone". Kristen is one of my favorite actresses, and I just love her style in general. So when my hair grows back, I'm definitely gonna try it!
This is Kristen for the 2009 MTV Movie Awards. These beautiful messy, sexy waves will never get old, and they're so easy to make! Take a look at this video:
This is Kristen for the 2009 MTV Movie Awards. These beautiful messy, sexy waves will never get old, and they're so easy to make! Take a look at this video:
Kristen Stewart chose the 2011 MTV Movie Awards to showcase no fuss no muss hairstyle. And she did it well, combined with the red safety pin custom made Balmain dress. To recreate Kristen's low-key yet sexy spent-the-day-at-the-beach waves, here is the tutorial:
Fekkai Celebrity Stylist Adir Abergel created a raw rock and roll style for Kristen. So, Abergel started by applying the Fekkai Advanced Full Blown Volume Styling Whip throughout and rough dried the hair. Once dried, he re-applied the Fekkai Advanced Full Blown Volume Styling Whip and re-dried the hair to create a natural wave. He then backcombed the hair from roots to ends spraying Fekkai Coiff Sheer Hold Hairspray and slightly ironed the hair. Finally, he brushed the hair to form the texture of the hair.
All products by Fekkai: Advanced Full Blown Volume Styling Whip ($23) and Fekkai Coiff Sheer Hold Hairspray ($24). Available at Fekkai.com and Nordstrom, Neiman Marcus, and Saks Fifth Avenue stores.
As she walked in the red carpet during the recent 2012 MTV Movie Awards, you can’t help but love her in her quirky lime and silver mini-dress, and of course, her signature wild tousles that a lot of girls would kill to achieve. She was all rock glam, and gorgeous! Here's an no-heat tutorial:
Wash your hair with a shampoo and conditioner (do not comb it but do brush it before washing). Let it air-dry for a while until it becomes a little damp. Work on some volumizing mousse through your hair to give it more body as well as a natural look when it dries up. Part your hair into four sections. Using scrunchies, twist the first section round and round, and as tight as you want them. Loose twists mean loose curls. Clip it up to a bun. Then, do the same thing with the rest of the sections. Leave the buns on for 1–2 hours, and then let them loose. Flip over your head and scrunch your hair with your hands to give it body and definition.
To achieve the side-sweep part, drag one section of your hair to the other side and secure them with bobby pins. For the finishing touch, finger-comb it or use some cream or spray to get rid of the unruly ones. The messier the better, good luck!
Etiketler:
hair,
how to,
kristen stewart,
messy,
MTV Movie Awards
12 Eylül 2012 Çarşamba
Glamorous Up-do
I've always loved these kinds of updos, like beehives. They look so glamorous and vintage, and if it sometimes ends up looking messy, you can't make a mistake, messy updos/beehives look amazing! And the deep slide gave it a chic touch and with that finishend the look. I just wish I had all that hair to experiment with these kinds of hairstyles... well I can only wait. Visit Bobby Glam for the original tutorial.
You need to section your hair off to fit the hair booty, leaving enough hair to cover the it. You can backcomb the roots of your hair if you are looking for an extra volume lift for this style. You can get the deep slide by parting your hair so it is in line with the arch of your eyebrow. Once you have sectioned off your side parting, secure in place with bobby pins.
Next you need to section your hair into two different sections. Using the end of your comb, begin from the top of your ear and work around your head to create a neat parting which separates your hair into two sections. Neatly tie the top section of your hair into a ponytail using your hair band to ensure it stays put. Now it’s time for the styling of the hair left down! It's always nice to add some extra flicks to the ends to get the retro vibe.
You basically straighten your hair until you get to the ends where you turn your wrist and flick the iron up. Spritz all over with hairspray and neaten up any fly-aways. Easy!
9 Eylül 2012 Pazar
Ashley Benson's Loose Curls/Apreciacion Post
Wow, 40,124 views are mind-blowing!! And I've got to thank my amazing 40 followers, for following and reading! This blog started just as an idea, nothing more. Then when I made it, and started posting, it was really boring, there was no one to even view it. But, I don't know why, I never stopped writing and posting... that led to me desinig my blog for the first time. I liked it, and so my blog kinda lived up. And look at it now, I could never imagine that happening, so thank you!
And to show you my apreciacion, here's an amazing tutorial. I was getting requests to post an medium length hair tutorial. I was thinking that curls look great on that length. Sure, all of you are familiar with the Pretty Little Liars series. I fel in love with Hanna's curls. They have that beachy, summery look, and it's easy to achieve! I love it! For extra tips and products that could help you with the look click here!
Who's you favorite character in PLL? Mine is Hanna!
6 Eylül 2012 Perşembe
Hair Extensions for Beginners
Well yes hair extensions! They can be very helpful when it comes to styling. It's actually very obvious why they're so important. The hair it's self is human, and of the best quality, so it's also very important to find a great quality hair extention clips. Why clips? Well they're the easiest to insert. I recommend HeadKandy extensions because the set comes with a lot of hair. Which is great if you want a real natural look.
I've learned all that in the Hair Extention for Beginners post from the amazing blog named WhishWhishWhish.
The colour is the least of the problem. You can always email the team and they would recommend you the colour that might fit you the best. So no worries about that. Insering them is very simple too, and even if you don't really get it this time, you can always check some videos. After some practice, if your hair colour is not completely matching the hair extensions colour, learn how to blend it all out!
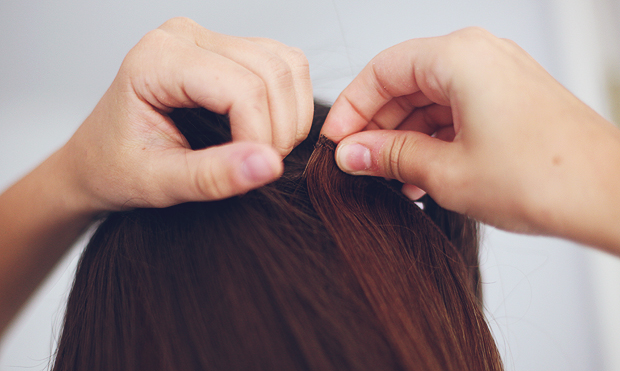
To put them in, you simply part your hair, clip up a section, backcomb at the roots slightly so the clips have something to grip, and clip away! There is a guide that comes with your extensions that tells you exactly where to put which section of hair, and each section is also numbered in the order you insert them too.
It all just takes a little practice. Do you use hair extensions?
3 Eylül 2012 Pazartesi
Loose Floral Updo
Effortlessly romantic, this simple twist is easy, versatile, and irresistibly femminine. Wear it loose and tousled for a bohemian effect. Floral headbans like this one, are so beautiful and always welcome on weddings. Katie from Skunkboy blog did this hair tutorilal on Etsy, Bridal Beauty, and I must say that this combination with a loose twist bun goes perfect with the flowers. Try it out!
Gather the hair on the top of your hair (where you want the bump to be) snd tease it. Take the hair and smooth the top and gather the sides. Start twisting the section of the hair into a half bun. continue twisting to make a bun. Pin everything in place and add a touch of flowers, lace, bows or whatever you like!
2 Eylül 2012 Pazar
Ponytail Twist
How often do you wear ponytails? They're so cute and there's nothing more trendy when you spice it up a little bit. The hair is very vital part with your everyday look. It can tell exactly how much you take care of it. And when you srtyle it, it can give a completly different look. So if you're looking for some great ways to spice up your hair, try this amazing 5min. tutorial from A Cup Of Jo.
Split your hair into two sections, straight down the back, but off center, about 3/4. You want one large section, and then one smaller section that's about an inch or two away from your ear. Than take the larger section and make a ponytail, securing tightly with a rubber band. Twist the smaller section AWAY from your face. Make the twist as tight as you can, so it doesn't become too loose later on. After that, wrap the twisted section over the top of the ponytail and around to the bottom. Pin the twisted wrap in place. After you've secured the twist with enough pins, let it untwist and blend in with the rest of your ponytail. Done and done! SO easy!
1 Eylül 2012 Cumartesi
Total Makeover!
See the new layout?! Well, I just made it! I also just made my Pinterest account, don't forget to follow me! My blog is really startting to grow, so I'm opening adversting on my blog! After I'm done with all the details, you can send me an e-mail, and get an adversting spot here! I'm so excited!
What do you think about the new layout?

Also don't forget to check out the tutorials! I've linked them all, but there's gonna be just this untill I update some new and old hair tutorials. You can't blame me, there's just too much of them! But, if you really want to see some more, just type in the search bar, hair. They're all tagged with it.
Kaydol:
Yorumlar (Atom)


